

Cover finishes
Cover finishes help printed covers last longer and present better in the hand. We apply practical coating and laminating options for brochures, magazines, reports and other commercial print that needs a cleaner look and added surface protection.
What cover finishes include
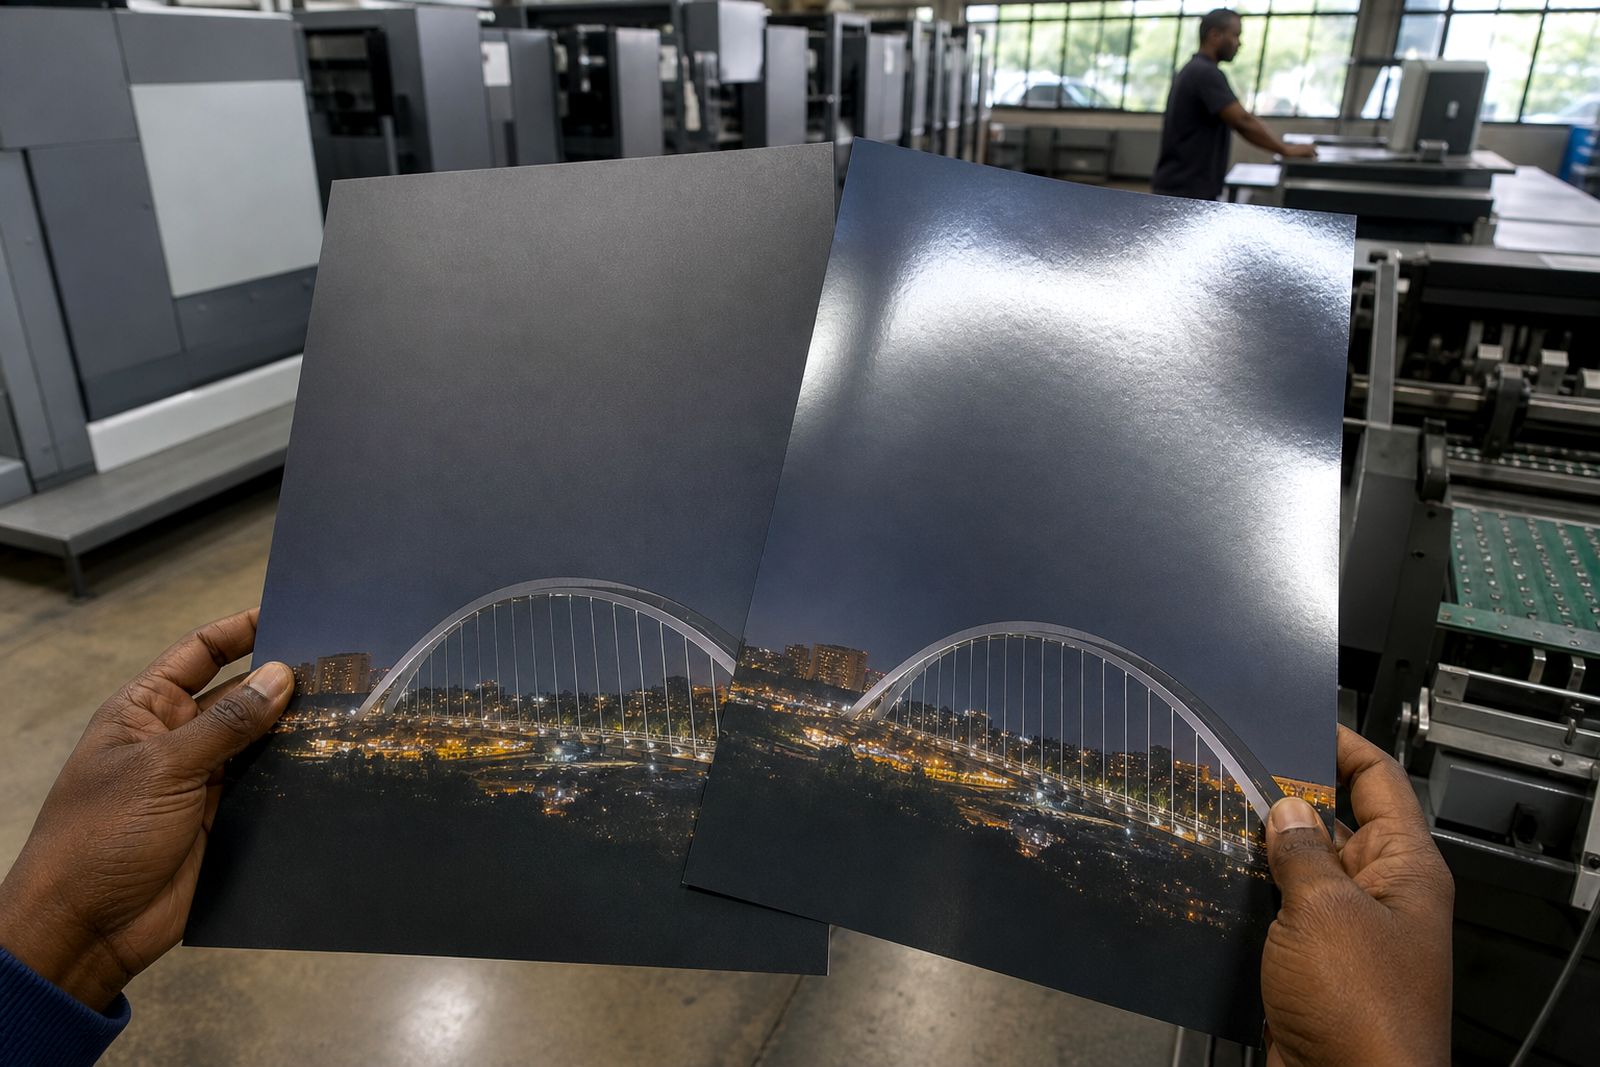
Cover finishing is the stage after printing where the outer surface is treated to improve appearance, handling and wear resistance. For business print this usually means a clear coating or a laminate applied to covers, heavier pages, self-covers and selected inserts. The right choice depends on how the item will be used, how long it must last, and whether you want a flatter reading surface or more visual shine.
We handle cover finishes for magazines, brochures, annual reports, booklets, folders and presentation pieces produced through our litho and digital print workflow in Durban. If a job is going to exhibitions, sales calls or repeated posting between offices, a protective finish often makes a real difference. In coastal conditions around Durban and across KwaZulu-Natal, extra surface protection can also help reduce scuffing and handling marks on darker covers.
- Gloss coating for brighter colour and a reflective surface
- Matt coating for a softer, less shiny appearance
- Gloss laminate for stronger surface protection
- Matt laminate for a smoother premium feel
- Spot application by request where artwork and quantity suit the process
- Cover finishing on one side or both sides depending on the product
Choosing the right finish for the job
Each finish changes the look and feel of the printed piece. Gloss options generally lift photographs, product shots and brighter colour areas. Matt options reduce glare and are often chosen for corporate reports, higher-end brochures and covers with a lot of text. Lamination gives more protection than a simple coating, especially on covers that are handled often.
There are also practical trade-offs. Very dark solid areas can show fingerprints more easily under some matt surfaces, while gloss can reflect strong office lighting. Folds, scores and spine widths must be considered before the finish is applied so the cover opens cleanly. For short-run digital work we also check toner adhesion and stock suitability before confirming the finishing route, as not every stock and finish combination behaves the same.
- Use gloss when image punch and colour pop matter most
- Use matt when readability and a more restrained look matter more
- Choose laminate for added scuff resistance on covers and folders
- Ask about scoring on heavier covers to reduce cracking at folds
- Plan for mailing, storage and handling before selecting the finish
How the finishing process works
We keep the process straightforward so artwork, print and finishing line up properly. Once your specification is confirmed, the job is booked with the correct stock, print method and finishing sequence. Covers are checked for size, bleed, spine and panel layout before going forward. Where needed, a proofing stage is used so the expected result is clear before full production.
After printing, sheets or covers are allowed to stabilise before coating or laminating. The finish is then applied using the method suited to the job quantity, stock and final use. Once cured or bonded, the work moves to trimming, folding, scoring or binding. Final checks are done for surface consistency, adhesion, cracking on folds and trim accuracy. On multi-part work, covers are then matched to inners and completed in bindery. It sounds simple but timing matters a lot here, especially on tighter turnarounds.
- Confirm print quantity, final size and finish required
- Check artwork setup including bleed, safe area and spine if needed
- Print covers on the specified stock
- Apply coating or laminate after print checks
- Trim, score, fold or bind according to the finished format
- Carry out final quality checks before dispatch or collection
What to prepare before sending your files
Good cover finishing starts with a file that has been set up properly. Covers should be supplied at final size with the correct bleed on all outer edges. Keep important text, logos and rules well inside the trim, especially on smaller brochures and narrow spines. If the piece folds, score positions and panel widths must be planned with the stock thickness in mind.
For covers with large black or deep colour areas, it helps to discuss expected appearance before print begins. Dense solids can react differently under gloss and matt surfaces, and very fine reversed text should be checked carefully. If you are unsure, use our file guidance pages and send a query through the contact form before upload. That usually avoids delays later on.
- Supply print-ready PDF files with bleed included
- Allow at least 3 mm bleed unless a different setup is agreed
- Keep critical content at least 5 mm inside trim
- Set spine widths from confirmed page count and stock
- Flag any folds, scores, creases or special panels clearly
- Note if the finish is front only, outside only or both sides
How cover finish pricing is worked out
Pricing for cover finishes is based on production factors rather than a single rate. The main drivers are finished size, number of covers or sheets, stock type and thickness, print method, the finish selected, and whether the job needs one side or two-sided treatment. Folding, scoring, trimming, binding and packing also affect the total because they change the finishing sequence and labour involved.
Quantities matter too. Medium-run litho work often prices differently from short-run digital work because the setup and finishing path are not the same. Oversize formats, special handling for dark colours, and tight delivery windows can also change the quote. For an accurate figure, send the specification through the quotation request page with quantity, size, page count, stock preference and required finish. We will advise on the most practical option rather than push an unnecessary extra.
Aftercare, handling and useful specs
Finished covers should be handled and stored with the same care as the printed job itself. Keep cartons flat, dry and out of direct heat. In humid coastal air, allow packed work to settle to room conditions before heavy handling or distribution, especially after transport between inland and coastal areas. This helps reduce curl on some combinations of stock and laminate.
For handouts, sales packs and magazine covers that will be stacked on counters, ask us which finish is less likely to mark under repeated contact. If the item will be written on, labelled or overprinted later, mention that before quoting as not all coated and laminated surfaces accept pens, stamps or labels equally well. If a cover has been creased or bent in use, surface scuffs may show more on dark matt jobs.
- Common finished cover stocks: about 200 gsm to 350 gsm
- Typical bleed: 3 mm on all outer edges
- Typical safe area: 5 mm from trim
- Gloss and matt available subject to stock and print method
- Scoring recommended on heavier stocks before folding
- Best results come from matching finish choice to end use
What our Commercial Printing customers say
Verified Google reviews
Questions we get asked
Is lamination always better than coating?
Not always. Lamination usually gives stronger surface protection, but coating can be the better choice where speed, look or budget are the main concerns. We recommend the finish according to the job's use.
Can you apply a finish to digital print covers?
Yes, in many cases. The stock, toner coverage and quantity all need to be checked first because some digital combinations need a specific finishing route for good adhesion and a neat result.
What if I am not sure which finish to choose?
Send your quantity, final size, stock preference and intended use through the website enquiry form. We can suggest a practical option for readability, protection and handling.

Ask for a quote
Send a note through the contact form with your print job, quantity, size, finish and delivery area, and the team will reply with a quote.
Open the contact form